Orchid Store Pro is a plugin and not a theme. Orchid Store Pro plugin extends the functionalities and features of Orchid Store, a WordPress theme. The main advantage of the plugin over a theme is that when switching between themes i.e. from free to pro versions, theme settings will change and have to re-configure all the settings. But by installing the plugin you’ll get extra features and functionalities without having a headache to re-configure every theme setting.
For most of the cases, you can look into Orchid Store documentation.
INSTALLATION
Since Orchid Store Pro is a plugin, we’ll follow steps that are different from installing a theme.
VIA WORDPRESS DASHBOARD:
You can install Orchid Store Pro via the WordPress admin dashboard. This will be the first process of installing Orchid Store Pro on your WordPress website. The instructions are as follows:
- Navigate to Plugins.
- Click on Add New button.
- Click on the Upload Plugin button. It will open the section below to upload the file.
- Click on the Choose File button and upload the .zip plugin file(Orchid Store Pro).
- Then click on the Install Now button.
- Once the installation is successfully completed, activate the plugin.
VIA FTP CLIENT:
- Login to your server’s file manager with an FTP client.
- Navigate to WordPress installation folder.
- Navigate to ../wp-content/plugins/ folder.
- Upload plugin folder with the FTP client into ../wp-content/plugins/ folder. Note: The plugin should be unzipped before uploading. If you’ve uploaded the zipped plugin file, you’ll have to unzip it.
- Login to WordPress dashboard & activate the plugin.
IMPORT DEMO DATA
Follow the same instructions as in Orchid Store Documentation to import demo contents.
MANAGE WIDGETS
Follow the same instructions as in Orchid Store Documentation to manage widgets.
There are 6 different additional widgets. There are extra layouts of OS: Banner, OS: Featured Product Categories, and OS: Recent Posts widgets, OS: Product deal widget, OS: Offer grid
OS: PRODUCT DEALS WIDGET
This widget also can be called a deal of the week, day or month widget to display exclusively on sale product.
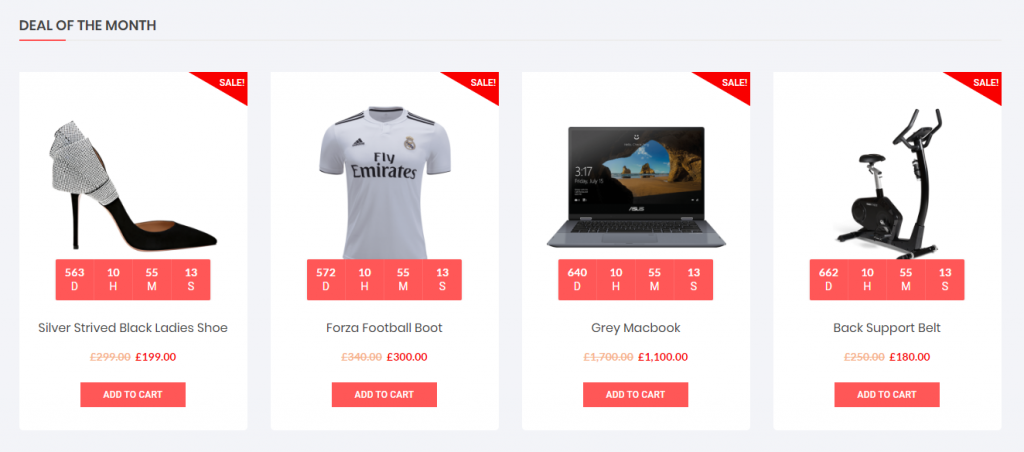
In order to set display products in deal widget please do kindly follow the steps below.
- Navigate to Dashboard > Products > All products
- Edit the product that you are willing to display at the deal widget
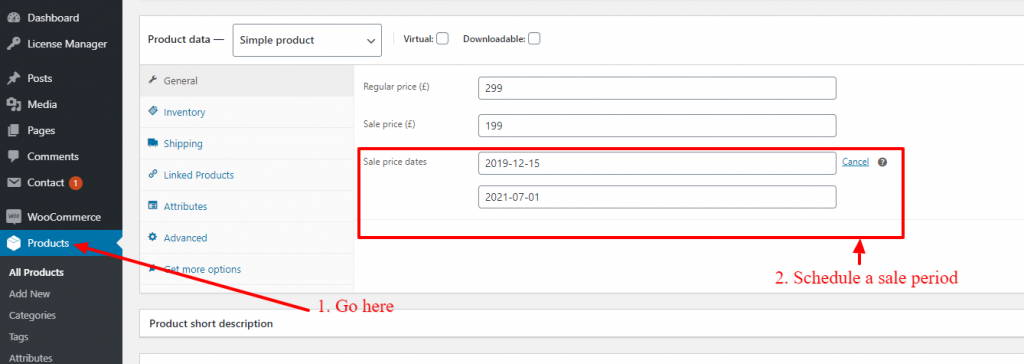
- Click save button
- Repeat this process to at least 3 products
- Done with the products now it’s time to put Os: Product deal widget to front page widget area.
Now, navigate to Appearances > Widget
- Find OS: Product deal widget
- Drag & drop product deal widget to the front page widget area
- It should work & display all the scheduled products with the count down clock.
OS: GRID OFFER WIDGET
This widget is used to display offer banners in the grid.

This widget can be used to display 1,2 or 3 images columns in a row. If you are willing to go with 2 or 3 columns make sure you use image banner with the same height. Below are the best image size for offer banners.
- 1 Banner image: 1300px width by any px height
- 2 Banner images: 600px width by 200px – 250px height
- 3 Banner images: 450px width by 200px height
If you wish to write text within the image itself you can simply skip with other text fields but make sure you check display this block while using this widget.
OS: FEATURED BRANDS WIDGET
This widget is used to list your associate brands or companies.

OS: CTA WIDGET
This widget serves as Call To Action.

OS: TESTIMONIAL WIDGET
This widget is used to showcase your customer’s testimonial.

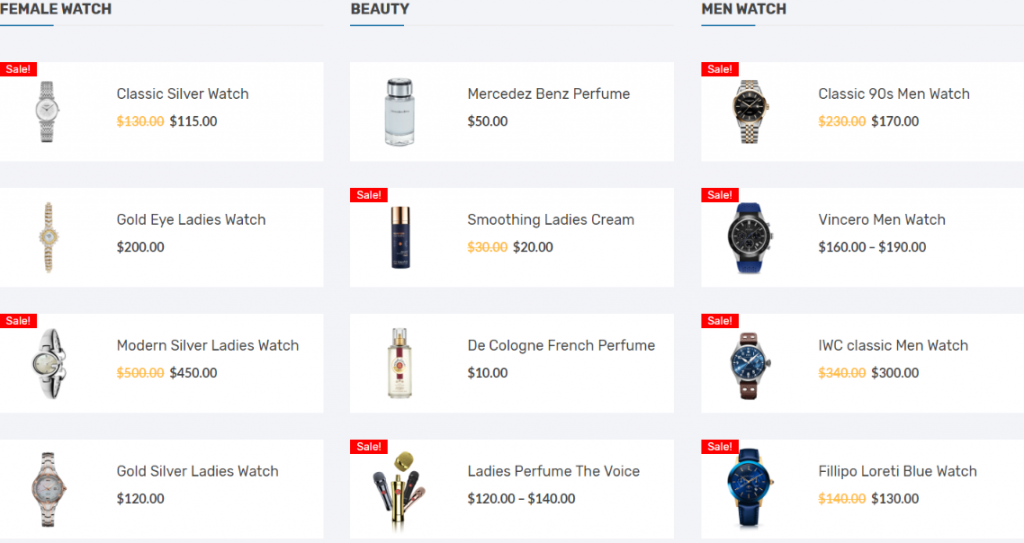
OS: THREE COLUMN PRODUCT WIDGET
This widget is used to display products of three different product categories.
OS: BANNER/SLIDER WIDGET

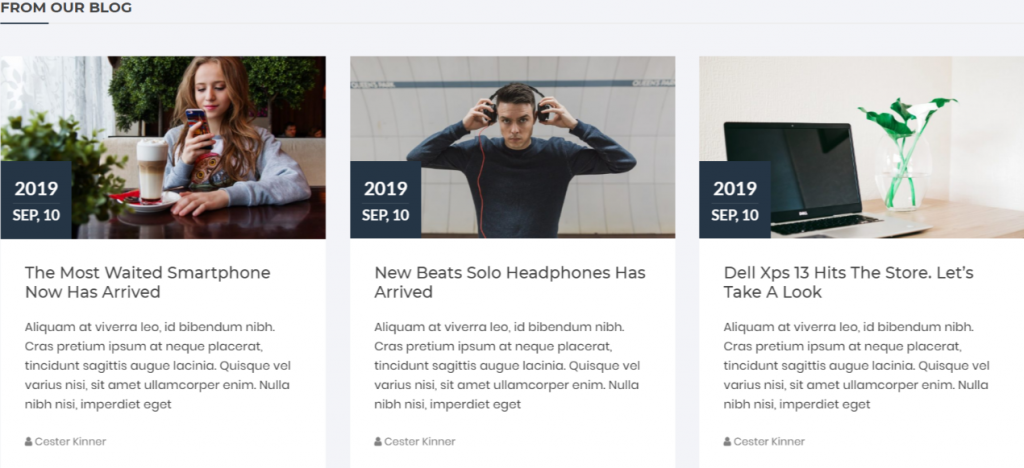
OS: RECENT POSTS WIDGET
OS: FEATURED PRODUCT CATEGORIES WIDGET

OS: INSTAGRAM WIDGET
Instagram feed widget is added in pro version addon plugin since version 1.0.2. You can use the Instagram widget in the frontpage widget area.
MANAGE HEADER
Although most of the header options are the same, Orchid Store Pro has newer pro options for the header. Orchid Store Pro has a new header layout, advanced color options and typo options for the header.

Navigate to Appearance > Customize > Header to play with advanced header options.
CUSTOMIZER: OPTIONS & SETTINGS
In the customizer, there are advanced options are added. You’ll find the advanced color and advanced typography options in most of the sections in customizer.
Navigate to Appearance > Customize, and configure front-end sections with available options.
SUPPORT
If you’re having difficulty with the theme and documentation is not helping you, you can drop your questions and queries on our Support Forum or through the support page. We will try our best to get back to you within 24 hours.