Are you looking to monetize your website displaying Google Adsense, Custom banner ads or advertisement from other networks? We do have simple & flexible plugin for that.
Check Universal Google Adsense & Ads manager Plugin Here: CLICK HERE
INTRODUCTION
One Hive is business multipurpose WordPress theme designed for running business organization, startup business, corporate business firms, portfolio showcase agency, freelancer portfolio or can be used to create any kind of multipurpose WordPress website. Below is the full documentation for One Hive WordPress Business Multipurpose Theme Documentation.
Click on the screenshot if the text written at the screenshot is not readable.
Support forum : Go Here
GETTING STARTED
First of all, Thank you so much for purchasing this theme and for being our loyal customer. You are awesome!
You are entitled to get free lifetime updates to this product + exceptional support from the us directly.
THEME INSTALLATION ( THROUGH WORDPRESS DASHBOARD )
You can install theme from WordPress admin dashboard. This will be the first process of installing theme in your WordPress website.
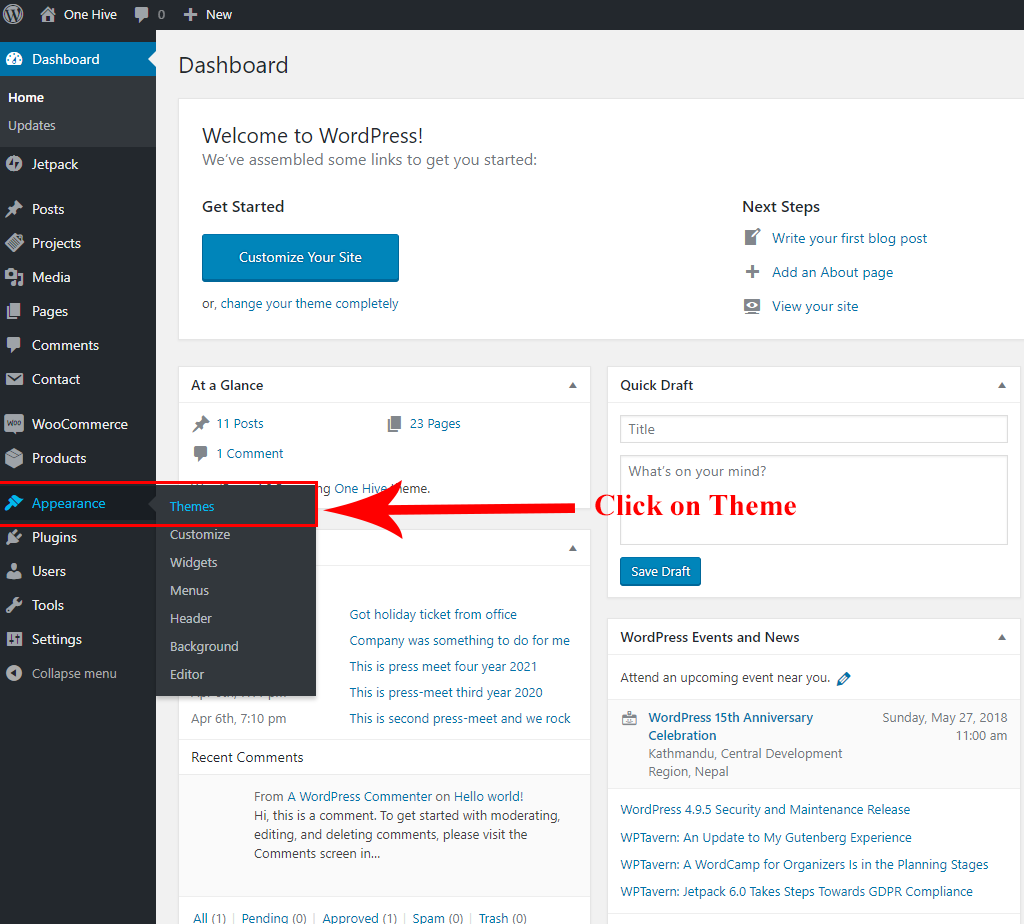
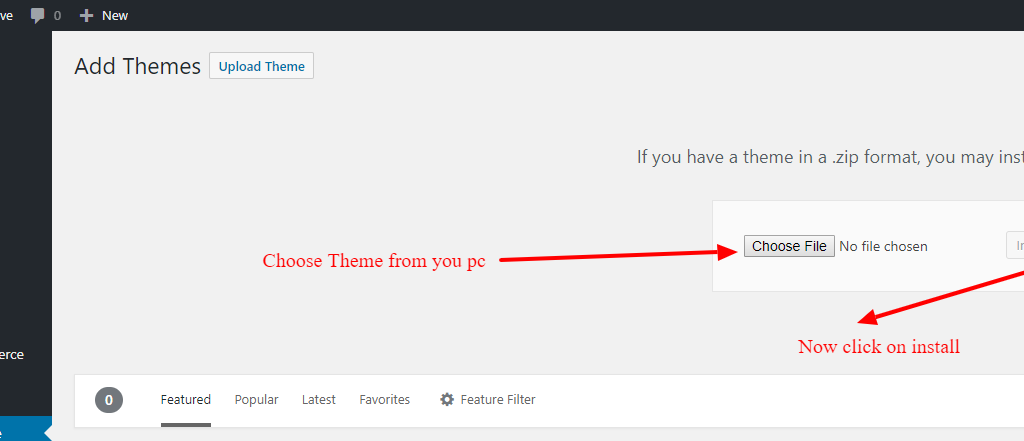
Select the theme from your computer & hit install. After you install Activate theme.
THEME INSTALLATION ( THROUGH FTP )
- Login to you file manager with FTP client with your FTP user-name & password
- Navigate to your WordPress installation
- Navigate to wp-content folder and then to themes folder.
- Upload our theme folder with the FTP client to Themes folder inside wp-content folder
- Log-in to wordpress dashboard & now activate the theme.
DEMO IMPORT
- Install plugin called “THEMEBEEZ : TOOLKIT” which is shown in recommended section.
- After installing, Welcome Message will be popup and click on Get Started or go to Dashboard > Appearance > One hive blog Info
- Install the plugins which are recommended from there and activate it.
- It’s time to import demo data, go to Dashboard > Appearance > Demo Import
- Now, you can see different demos and click on import which you like.
- Wait ( approx: 3 – 5 minutes ) to get all data to be imported as per your internet speed
- When demo import is done, now its time to setup widgets, banner, menu and few other settings according to your requirements.
ACTIVATE HOMEPAGE
By default WordPress sets all theme to blog page ( NOT HOME PAGE ). You have to manually set your homepage. To set your homepage you navigate to Dashboard > Appearance > Customizer > Site Option > Check the Front page option.
If you think your Frontpage/ Homepage didn’t got activated let us know.
CUSTOMIZER OPTIONS
One Hive is crafted with handy important customization options powered by wordpress live customizer. You can find all options under Dashboard > Customizer.
Font Option ( PRO ) : You can switch between 800 ++ Google fonts according to your requirements.
Colors ( PRO ) : You can switch any primary color that best match your brand or need.
Hide/Show : Some content information like date,category,date,author etc can be enabled or disabled through Dashboard > Appearance > Customizer > Content options.
Excerpt length : You can change the length of excerpt from Dashboard > Appearance > Customizer > Theme options > Others.
Fall back Default image ( PRO ) : You can enable support of fall back image if there is no image in post from Dashboard > Appearance > Customizer > Theme options > Others.
One or Multi site : One Hive can be used either Multi page or one page. You can tweak this from Dashboard > Appearance > Customizer > Site option. When One page is enabled, you can enter id for the sections and set custom link in primary navigation items like eg: ( Enter ID for blog section “blog” now go to menu & add custom link with link #blog and name it Blog. Then save ). Try it yourself. If you do not understood let us know on support.
Section re-order ( PRO ) : One Hive is crafted with section drag & drop option. You can drag and drop and change the location of sections up and down according to your need. To re-order sections navigate to Dashboard > Appearance > Customizer > Home page option > Section re-order.
Sidebars : We understand that some peoples may not like sidebars. To make your need hassle free we have added sidebar options you can have sidebar either in left, right or completely disable it. Dashboard > Appearance > Customizer > Theme options > Others.
More : More basic options are available!
HEADER SECTION
You can basically tweak header section with colors and icons as per your need. You can do that in few clicks though WordPress Customizer.
Options for Header section are placed inside WordPress customizer which are sticky header, header background color, header top icons and contact details , Header Gradient color, Changing logo.
Sticky Header ( PRO ) : Make logo & navigation portion sticky when scrolling
Header background color : Change header background color either gradient or solid colors.
Custom logo : Make sure height of logo is 60px. As header portion of One Hive is small so One Hive theme looks best with logo of 60px height. Your width of logo could be anything like 200px, 300px, 250px or something like that.
Header top & header top social icons : You can assign social icons at header top from when you enable header top section.
Header top contact details : You can show or hide contact contact details in header top when you enable header top section option.
HEADER TOP SECTION

One Hive Header top section can be enabled from customizer. Navigate to WordPress Dashboard > Appearance > Customizer > Theme options > Header > Check header top option.
For Contact details options are inside Theme options > Contact info & Social icons also can be found just under the contact info options.
HEADER SECTION PRIMARY NAVIGATION & LOGO
Logo can be changed from Site identity option inside wordpress customizer. If you are adding a custom logo make sure height of your logo is 60px.
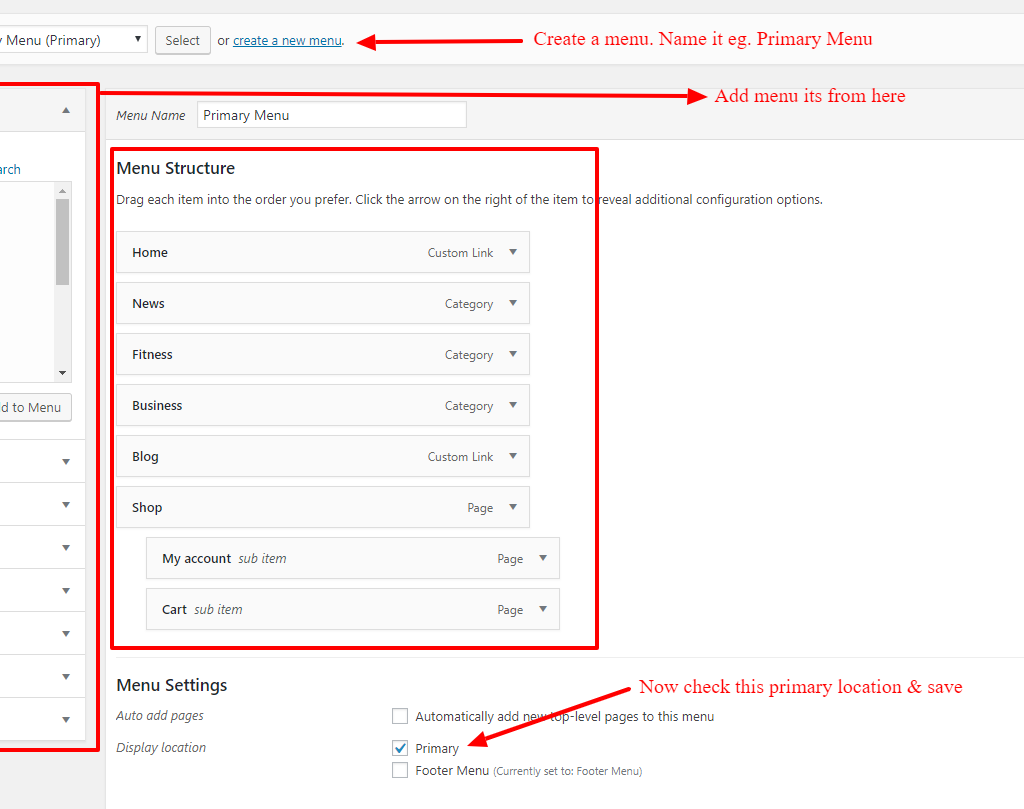
Primary Navigation can be added from wordpress dashboard > Appearance > Menu.
See the screen shot below.
SECTIONS
One Hive is build with adequate sections to make your life easy & you can easily use them as per your need. WordPress Dashboard > Appearance > Customizer > Homepage Options.
Sections can be enabled – disabled as per your need. Sections can be drag and dropped. You can set either background color or background image for the sections. Some sections are different in nature when talking about the design. Placing background image may not look good on that case.
BANNER SECTION
One Hive Pro comes with 4 types of banner options Where as free version only has only 2 banner options.
- Image background – Create a page & set image as feature image & publish. Select the page that you have created from banner options at customizer. Page title will appear as banner title, page editor content as banner description & featured image as banner image.
- Video background ( PRO ) – Upload video to media & select video from customizer > banner options > Video background.
- Animated partials background ( PRO ) – Go to customizer > banner options > Animated background.
- Gradient background ( PRO ) – Go to customizer > banner options > Gradient background. You can select colors but if you are not getting the color that you are looking for do kindly connect with us at forum, we will share you a custom css ( style code ) which you paste in your WordPress customizer custom css area.
You can easily change the look and feel of banner section in One Hive Theme though Customizer. Navigate to WordPress Dashboard > Appearance > Customizer > Homepage Options > Banner
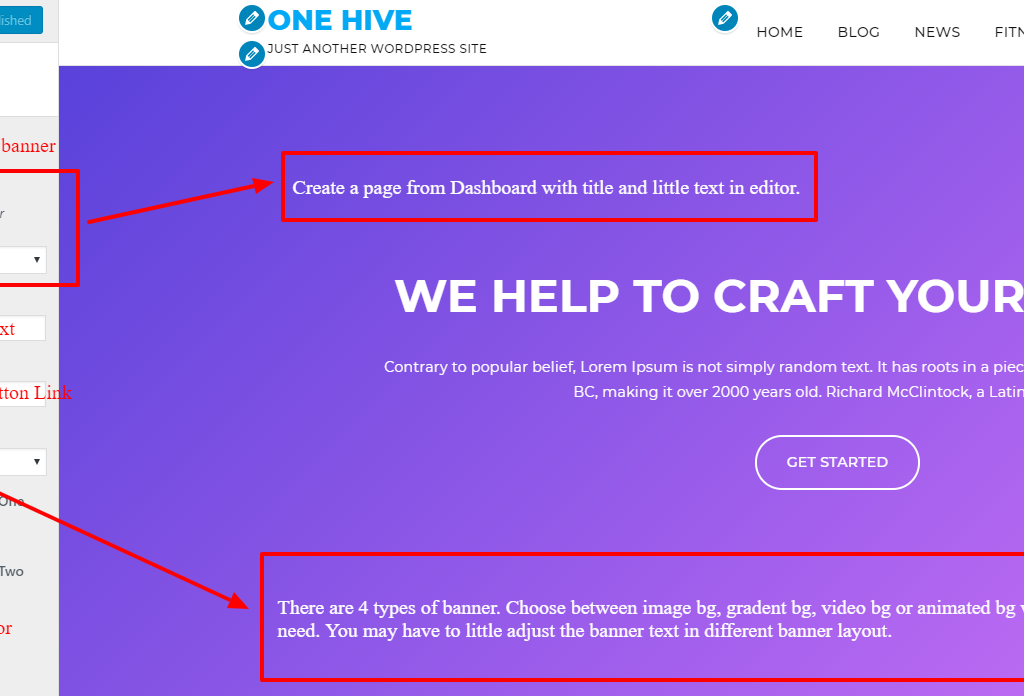
You can choose between Image background, Video background, Gradient background, Animated partials background.
Free version has limited choice.
AUTHOR SECTION
You can customize author section from WordPress Dashboard > Appearance > Customizer > Homepage Options > Author.
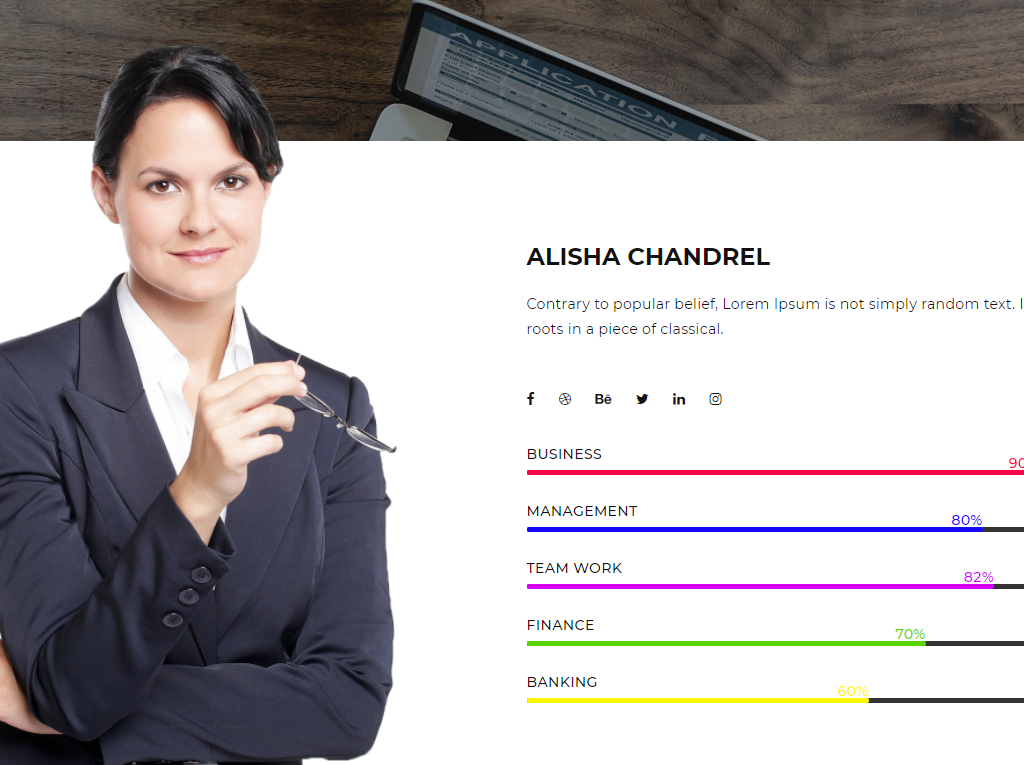
Create a page with name of author or company. Navigate to WordPress Dashboard > Appearance > Customizer > Homepage Options > Author section. Select the page that you created for Author. Theme will use Name, Short description & featured image from that page for this section.
Basically the author section is designed for long vertical image. For the best result the size of the author image should be 800px width & 1350px height.
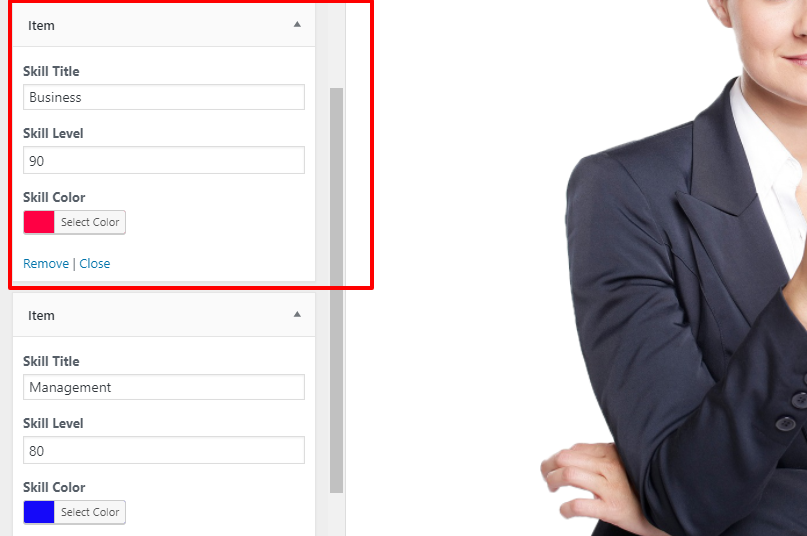
You can enter your social network profile to enable social icons. For skills bars add items and enter value as shown below in screen shot.
FEATURES SECTION
You can customize this section from WordPress Dashboard > Appearance > Customizer > Homepage Options > Features section.
Choose between background colors, enter section title & description and add features items.
Basically features items are pages with title & little descriptions. Recommended length of item description is around 3 lines.
COUNTRY SECTION
You can customize this section from WordPress Dashboard > Appearance > Customizer > Homepage Options > Counter section.
Choose between background image & background color. We personally recommend nice background image for this section.
Add counter items, enter number & choose awesome icon as per your counter item.
TEAM SECTION
You can customize this section from WordPress Dashboard > Appearance > Customizer > Homepage Options > Team section.
Information of team members like Name, featured image, designation can be filled while creating a page from dashboard & then add team items from customizer. You can enter social icons for team members from when adding team member item.
Check below the screenshot below.
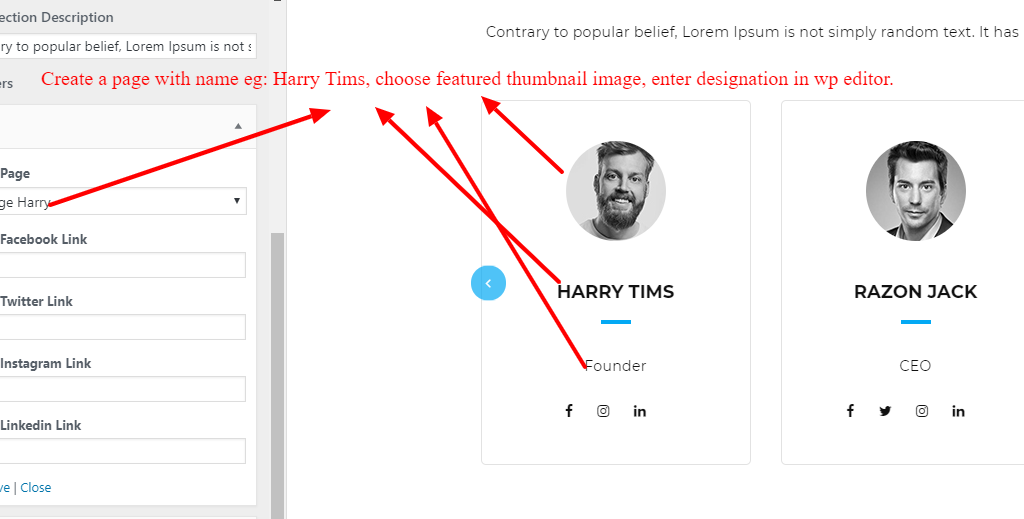
Image size of team section team members featured image is 200px width & 200px height. Image you select will be cropped but maintain aspect ratio when uploading.
SERVICE SECTION
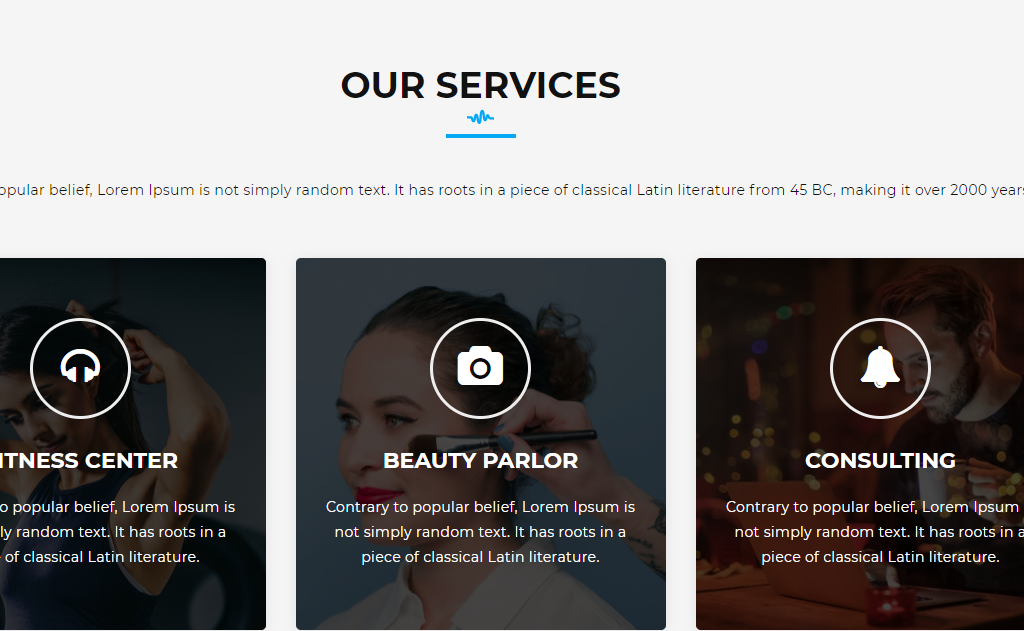
Service section is alternative to features section. You can add featured images as background overlay in your items to make it more appealing. To customize navigate to WordPress Dashboard > Appearance > Customizer > Homepage Options > service section.
Rest everything is same as features section.
PROJECT SECTION
Navigate to Dashboard > Projects.
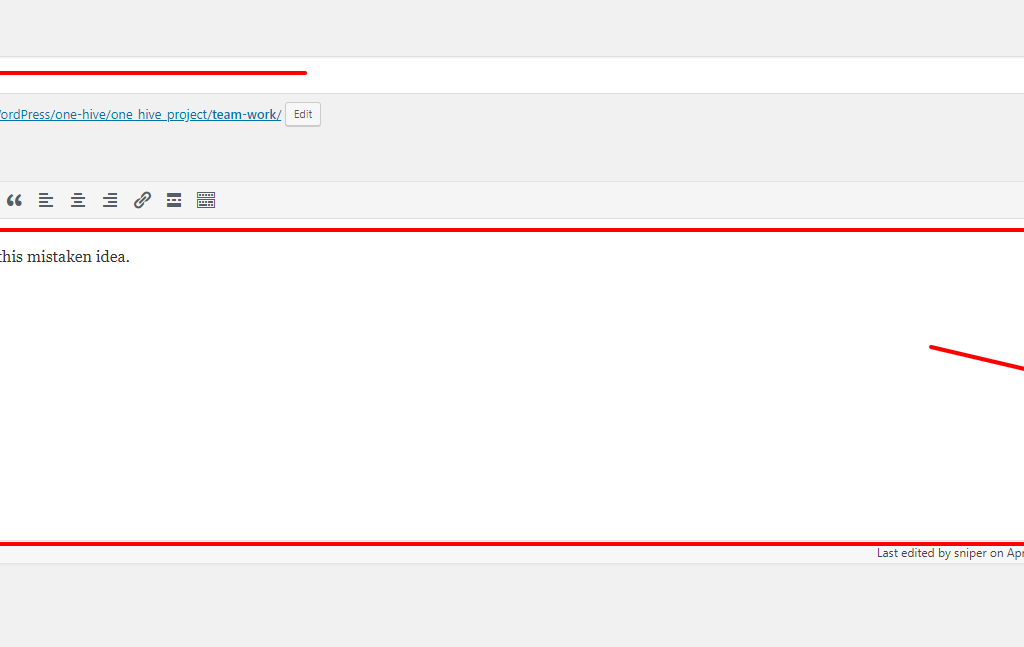
- Add New
- Enter the title of project
- Enter the description of project
- Create or select a category for the project which will be displayed as tab in front-end
- choose the featured image for the project
- save
Now, Navigate to Customizer > Homepage options > Project section
- Enable the section
- Choose background color if you want different from white
- Enter title & description for the section
- Choose the category that you created for project
- Done.
PRICING SECTION
To customize this section navigate to customizer > Home page options > Pricing Section.
- Choose background color for the section
- Enter title & description
- Enter the value for pricing card table as shown in screen shot below.
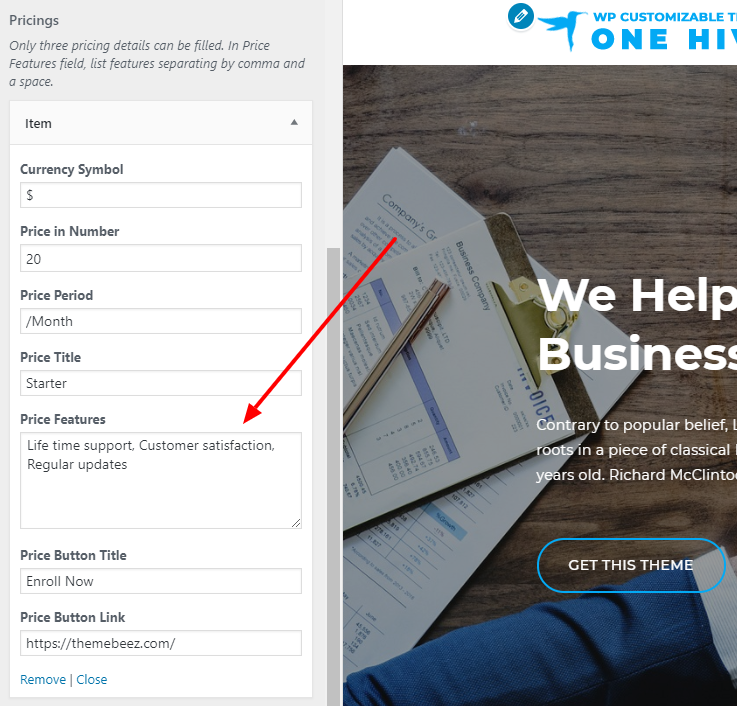
Important : Price features must be written serpented with coma & Max number of pricing card is 3.
NEWS SECTION
Add posts in your posts from Dashboard > Posts & assign them a category. Navigate to customizer > Home page options > News Section and choose the category.
Important : Featured image is required as it is in carousel slider.
BLOG SECTION
Add posts in your posts from Dashboard > Posts & assign them a category. Navigate to customizer > Home page options > Blog Section and choose the category.
Important : Featured image is required as it is in carousel slider.
TESTIMONIAL SECTION
To add testimonial follow the instructions below.
- Add new page
- Enter title as client name [ eg: John Deo ]
- Enter review text in editor
- Select Featured image
- Save
Navigate to Customizer > Home page options > Testimonial section.
- Select the page that you created
- Enter designation of the client
- Enter the rating [ 1 – 5 ] eg: 4
CTA ( CALL TO ACTION ) SECTION
To add testimonial follow the instructions below.
- Create a page
- Enter the title
- Enter description in editor
- Choose the featured image for call of action section ( Select big size image recommended 1920px width & 600px height )
- Publish
Navigate to customizer > Home page options > CTA section. Select the page you have recently created for call to action page & enter the button link, title and hit publish.
PARTNER SECTION ( PRO )
To add items in this section navigate to Customizer > Home page Option > Partner section.
- Add new item
- Select or upload new image to media
- Enter partner link if required
- Publish
CONTACT SECTION
Contact Form : To add an contact form follow the step below.
- Add a plug in called contact form 7
- Activate plugin
- Click on contact
- Create a form
- Adjust settings of contact form 7
- Save
- Copy Short code given by contact form 7, which basically looks like eg: [contact-form-7 404 “Not Found”]
- Navigate to Customizer > Home page options > Contact section
- Paste the short code.
Map : To enable map You can copy iframe code from Google map and paste the code in map widget from Dashboard > Appearence > Widget > Map widget. Define height and width. Recommended sizes are 600px Width & 400px Width. You can adjust this according to height of your contact form.
FOOTER SECTION
As One Hive is business multipurpose theme we do have special widget ready for one Hive. You can add widget for footer from Dashboard > Appearance > Widget
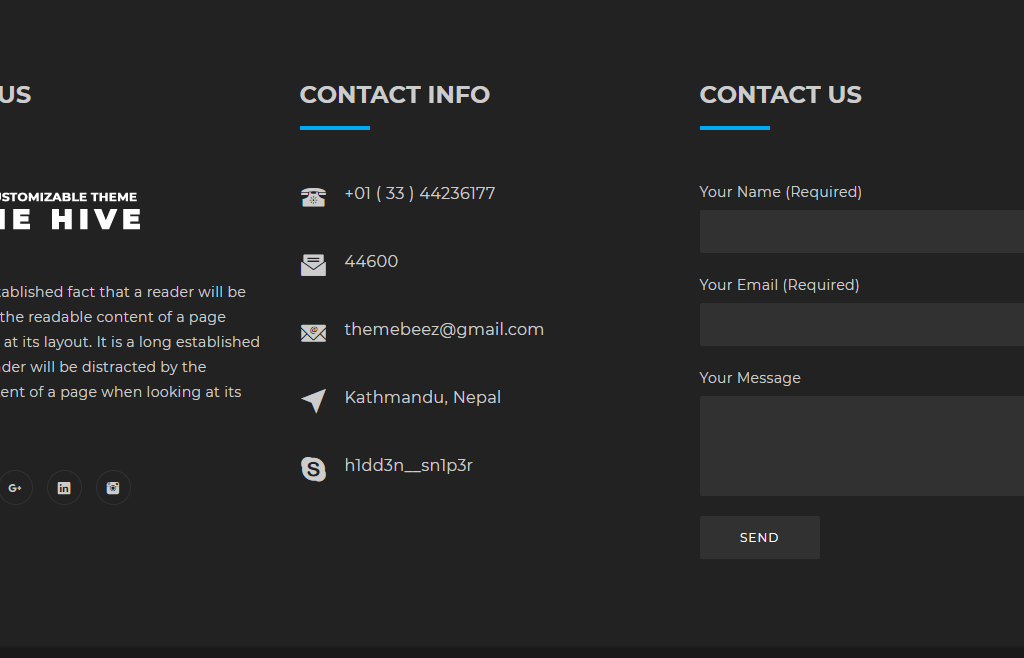
Available special footer widget are as follows:
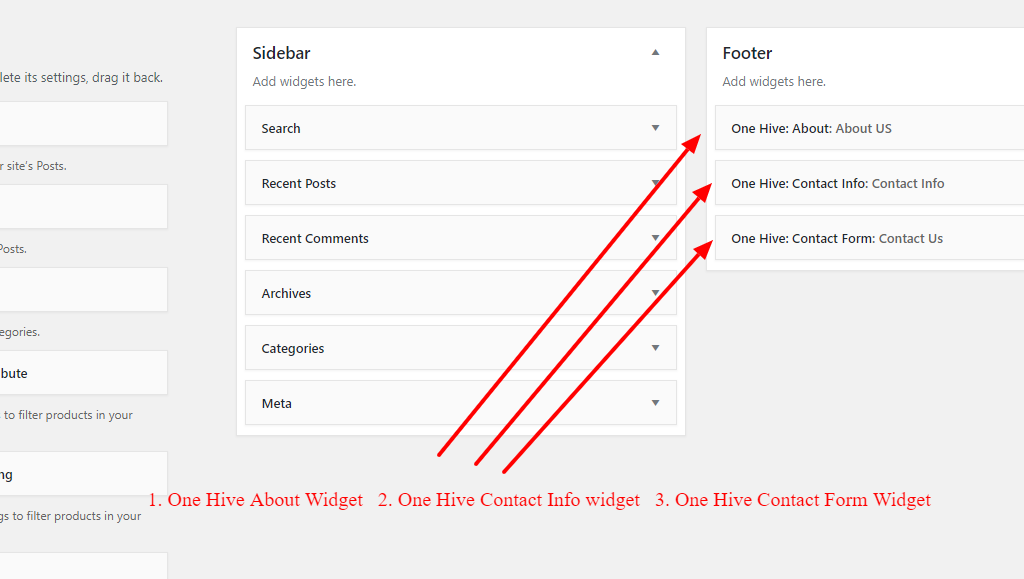
- One Hive About widget : Crafted to show your about info along with logo & social icons
- One Hive Contact info widget : Crafted to show you contact info
- One Hive Contact form : Install contact form 7 plug-in and create a form. Copy the short code & paste in this widget. Then save.
To change the footer copyright information navigate to customizer > Theme options > Footer.
To Assign the navigation menu items in footer ( PRO ) create a menu from Dashboard > Menu
- Create a menu
- Assign menu items
- Click menu location Footer menu
- Save!
WOOCOMMERCE
One Hive both free & pro version supports WooCommerce.
- Install Woocommerce plugins from Dashboard > Appearance > Plugins
- Active WooCommerce plugin
- Add product and visit shop
Important : One Hive supports woocommerce and all basic woocommerce functionality but One Hive theme may not be good ideal solution for large e-commerce store or something like that. One Hive Woocommerce pages design may not look good if you try to extend woocommerce pages with woocommerce 3rd party extensions and plugins. We don’t guarantee you for all woocommerce 3rd party extensions and plug-ins to work perfectly as expected.
All basic woocommerce functionality should work fine & we are here for support if you face any issue in future. One can start a medium scale store with one hive theme using woocommerce plugin.
QUESTIONS & SUPPORT
You are in the right hand. Feel free to contact us though LIVE chat or support forum for any questions and support.
WANT CUSTOMIZATION ?
We are here to help :). We have a very reasonable cost per hour charge to customize theme according to your need. You can either contact us though email or Look for Live Chat option.