Click on the images if you are not being able to see them properly

INTRODUCTION
Welcome to Universal Google Adsense And Ads Manager ( UGAAM ) plugin documentation. Universal Google Adsense and Ads Manager is a flexible easy to use Google Adsense, custom ads & script manager WordPress plugin. Universal Google Adsense and Ads manager ( UGAAM ) allows WordPress users to monetize your website easily.
This documentation will help you to get started with UGAAM. This documentation will also guide you to monetize your WordPress website easily.
This is an official documentation guide of UGAAM plugin but if you are looking for a step-by-step guide then go here.
INSTALLATION
You can install UGAAM the same way that you install other plugins. Follow the instruction below.
- Navigate to Dashboard > Appearance > Plugins
- Click on Add new button
- Click install
- Once installed, click Activate
- Once UGAAM is activated, you can view UGAAM welcome page at Dashboard > UGAAM
As you have already noticed the installation of UGAAM is pretty straight forward.
UGAAM PAGE AT DASHBOARD
Once you have installed & activated UGAAM. You will be noticing new menu item at your WordPress dashboard.
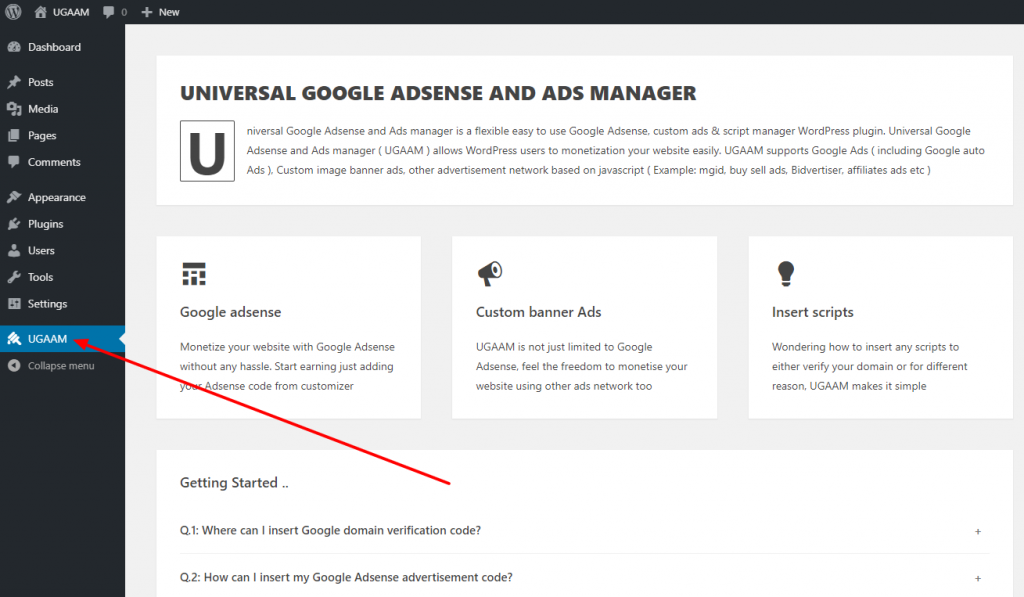
UGAAM welcome page contains various information about UGAAM. Kindly go through the contents of UGAAM page. UGAAM welcome page at the dashboard will be having introduction video shortly in future. It also has few links on the right side which will help you navigate.
INSERT SCRIPTS
UGAAM not only allows you to display ad, but it also helps you to insert scripts at header or footer. Look at the screenshot below in order to know how you can insert your script at header or footer.
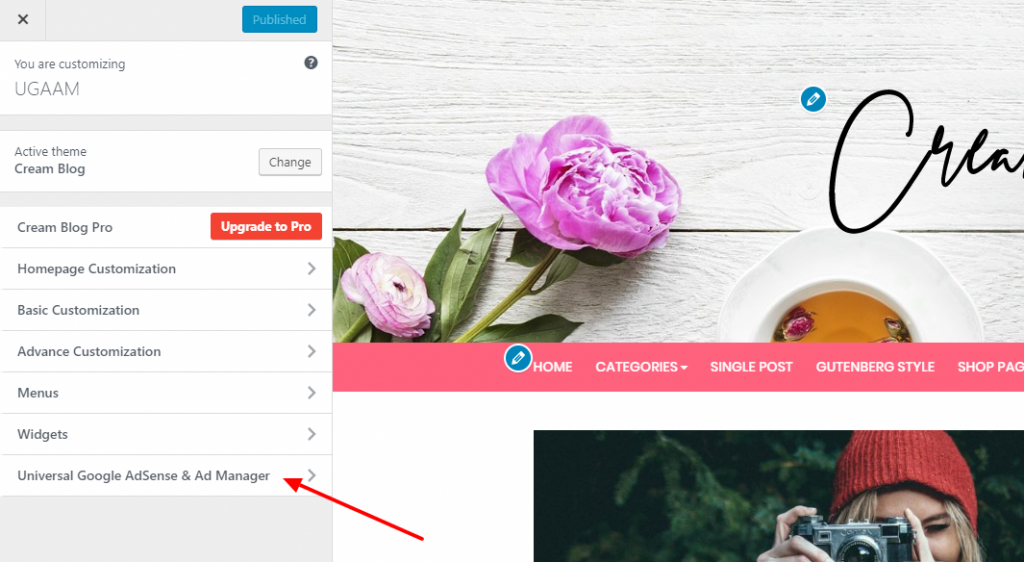
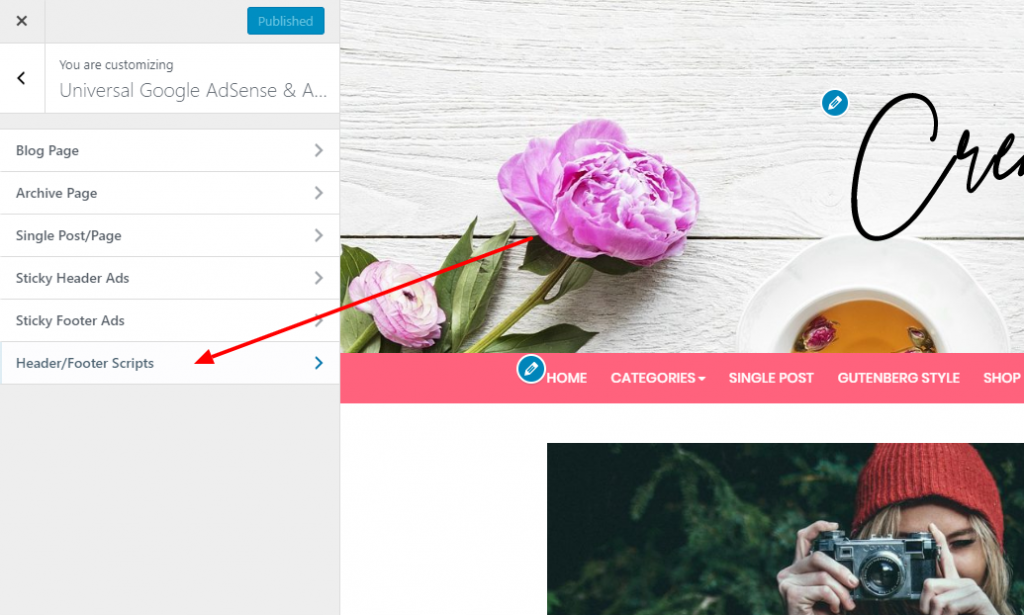
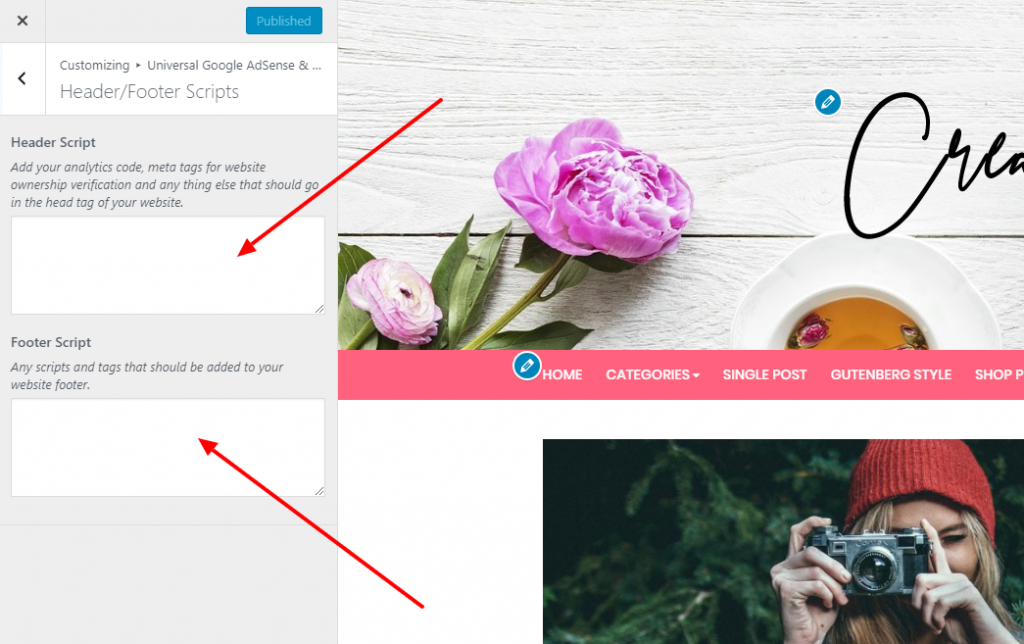
You can always access Header/Footer script section at customizer from Dashboard > Appearance > Customizer > Universal Google Adsense & Ads Manager > Header/Footer Script Manager
ADVERTISEMENT TYPES
UGAAM supports three types of ads. Well yes, it’s two but let me tell you something here. It supports three if you would like to treat Google Adsense & ads script from other networks different.
GOOGLE ADSENSE:
You all know about Google Adsense. How would you like to use Google AdSense? Google Adsense can be used in two different approaches. Below are the possibilities.
GOOGLE AUTOMATIC ADS:
Auto Ads is an improved monetization method in Google AdSense. It uses machine learning to make smart ad placement for your website. When this is enabled, Google will analyze your site and show ads only when it thinks they will perform well and provide a good user experience.
If you are planning to use Google auto ads, please do kindly turn off all types of other ads. You can simply paste google auto ad script from Dashboard > Appearance > Customizer > Universal Google Adsense & Ads Manager > Header/Footer Script Manager. Here header section is recommended.
SCRIPT ADS FROM OTHER ADVERTISEMENT NETWORKS:
As all script ads work same like Google Adsense, select Adsense option when inserting script for advertisement from other networks. Common supported networks are like ( MGID, BuySell ads, Click bank, Blue host affiliation & Siteground affiliation ). Feel free to test other advertisement networks & let us know if you experience any issue.
CUSTOM IMAGE BANNER ADS:
Ugaam supports custom banner ads. Simply check Custom banner ads option where you would like to display your banner advertisement & upload image as well as you can add permalink if you wish.
SHORTCODE
This feature is intended for developers, designers & for those peoples know uses of shortcode. You can display an advertisement using shortcode anywhere on your website. Below is the format of the shortcode.
EXAMPLE OF SINGLE ADVERTISEMENT
[ugaam_ad] <--- Your ad code goes here ---> [/ugaam_ad]
EXAMPLE OF MULTIPLE ADVERTISEMENT
[ugaam_ad]
  <--- Your advertisement code goes here --->
  <!-- ad -->
  <--- The second advertisement code goes here --->
  <!-- ad -->
  <--- The third advertisement code goes here --->
  <!-- ad -->
  <--- The fourth advertisement code goes here --->
[/ugaam_ad]
Note: did you notice? After each advertisement code <!-- ad --> comes & then another advertisement code goes there. If you are still confused with these examples you can check that information on UGAAM wordpress.org plugin repo.
UGAAM WIDGET
Hope you found a way to display advertisement in blog posts, Archive page, Search page, Header & Footer sticky advertisement area. Here, the question may arrive, How shall I display ads in sidebar, footer & Maybe other sidebar widget area.
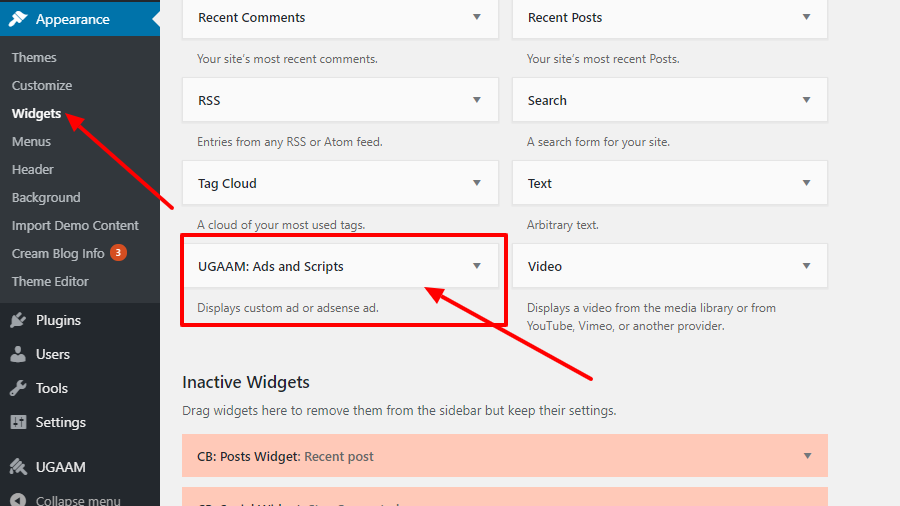
You can place ads using UGAAM widget to widget area like sidebar, footer & Maybe other sidebar widget area. Drag UGAAM widget from Dashboard > Appearance > Widget to sidebar, footer & other widget area.
UGAAM DETAILED GUIDE
Again, if you need a detailed practical guide on how to add Google AdSense to WordPress website you can refer to our blog post here.
SUPPORT & HELP
We are actively supporting UGAAM plugin. Please feel to let us know if you want to contribute to this project. As all free plugins are maintained as per users feedbacks, kindly feel free to report us if you find any bugs or issue. You can reach us through our support page or through UGAAM plugin review.
We have written a complete step-by-step guide to use UGAAM plugin at our blog. Make sure you read the post whole post “How to add Google Adsense to WordPress” before contacting us for support.